Using Timecode Slates On Location
Utilizing timecode on set should be a very painless process provided you are using industry standard cameras with timecode capabilities and quality audio gear. Timecode enabled slates are very useful for ensuring your syncing process is smooth.

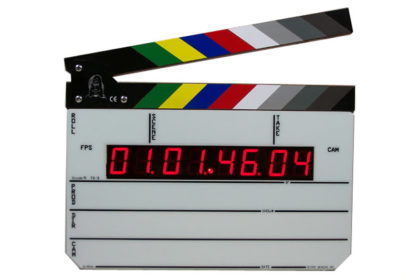
One of the earliest ways used for syncing sound to picture was the simple slate. The video portion was identified on the slate by writing the scene and the take number. These were then read into the microphone. The clap created a sync point for the audio and video. This technique still works very well even if it is a little time-consuming. With a digital slate like the Denecke TS-C, that provides a digital readout of the timecode being recorded to audio files, it becomes very easy to identify the correct audio and video to sync, even if the camera is not timecode enabled.
If all is going to go well in post, it’s important that proper slating procedure is followed on set. Remember these tips and you should have a painless post process.
- First thing at call time, the audio recordist should sync the slate to their recorder and then provide the slate to the camera department.
- The sound mixer should check with the camera department and see if the camera or cameras can be jam synced. If not, the post-production team will be relying on proper slating by the camera department. Additionally, timecode “lock” boxes can be added to timecode enabled cameras as a failsafe.
- The second assistant in the camera department should check with the script supervisor and make sure they’re on the same page about slating. The script supervisor will be providing notes to the editorial team and the notes need to match the video.
- Every take must be identified properly in writing on the slate. The slate should be readable at the beginning of each take and then clapped. The clap will provide a sync point for camera footage that does not include timecode or has experience drift. Some cameras will drift but using proper slating, the problems caused by this will be minimized.
- The Second Assistant Camera should read the slate including roll, scene and the take number before marking with a clap. Additionally, if there’s more than one camera state which camera they’re marking, they should need verbally say which camera they’re marking while marking all cameras.
- Tail slating is sometimes necessary when the director calls “action” before the scene has been marked. In this instance, the camera assistant will mark the footage after the action is completed. They will also hold the slate upside down and say “tail slate” before reading the slate information.
- The sound mixer should be aware of how the footage is being slated and do their best to mimic slating with their file names. Due to the limitations of the naming of WAV files, it’s not always possible to have the names match perfectly. In this case, the mixer should make notations in their sound report on how the files are named.
- The sound mixer should be checking the timecode on the slate periodically throughout the day. It’s also standard practice to re-jam the slate after lunch.
Follow these procedures and you should have good luck syncing footage on your next production.
Posted on: February 21, 2019, by : Jimmy Gilmore